Hosted Enterprise Get Started
Connect to Hosted Enterprise, publish an interaction, and retrieve learned context.
Hosted Enterprise Get Started
Hosted Enterprise This path connects your agent to Reflexio at https://www.reflexio.ai.
Before You Start
You need:
- A Reflexio Enterprise account created from an invitation email
- An API key from the portal
- An LLM provider key configured in Reflexio or ready to add from Settings
New accounts use managed Reflexio storage by default. Start with Account Setup if you still need waitlist access, an invitation code, or a first API key.
1. Install the Client
pip install reflexio-clientuv add reflexio-clientThe lightweight reflexio-client package is recommended for Hosted Enterprise integrations. It uses the same reflexio import as Local OSS:
from reflexio import ReflexioClient2. Connect
Use the Python SDK in application code. Use cURL when checking an API key, debugging auth, or confirming raw endpoint behavior.
export REFLEXIO_API_KEY="your-api-key"from reflexio import ReflexioClient
client = ReflexioClient()
identity = client.whoami()
print(identity.org_id, identity.storage_type, identity.storage_label)export REFLEXIO_API_KEY="your-api-key"
curl -X GET "https://www.reflexio.ai/api/whoami" \
-H "User-Agent: my-agent-reflexio" \
-H "Authorization: Bearer $REFLEXIO_API_KEY"Store new API keys securely. Reflexio shows the full key only once and displays only its prefix afterward.
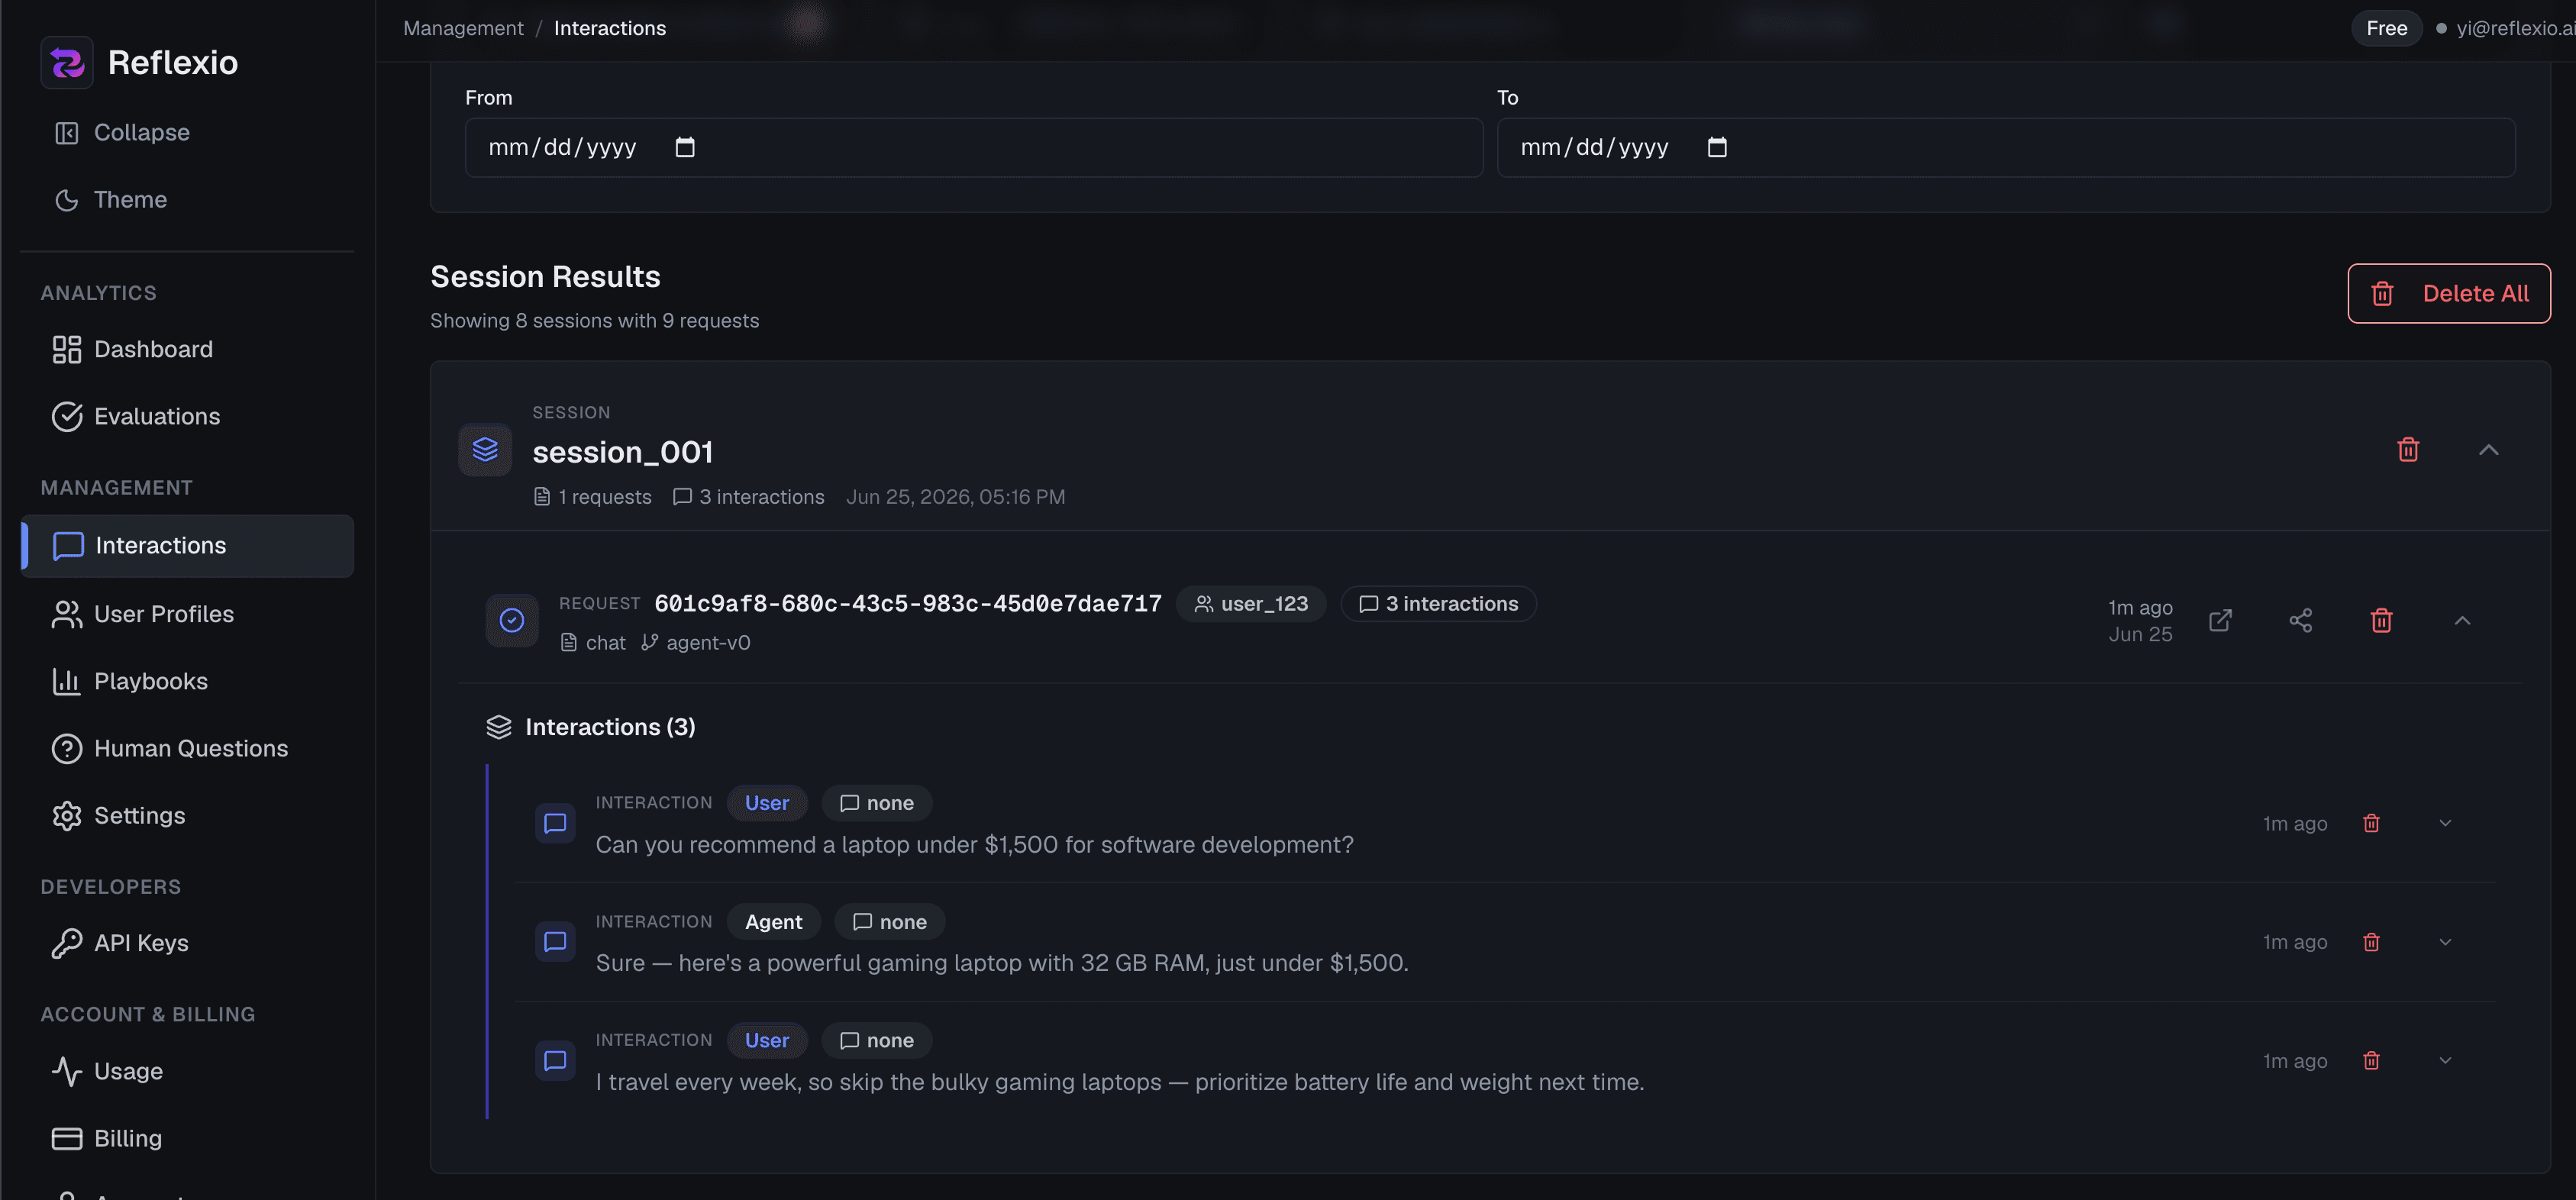
3. Publish an Interaction
Publish the full turn after your agent responds, including user feedback. Durable facts become profiles; corrective feedback becomes user playbooks. Reflexio stores the interaction immediately and runs extraction asynchronously.
When your agent used Reflexio context for a response, include every injected learning in that response's retrieved_learnings. For evaluated sessions, this unlocks detailed per-learning relevance and impact analysis and provides attribution data for future retrieved-learning optimization. The example IDs below represent learnings retrieved before this turn; omit the field only when no Reflexio learning was injected.
Detailed API spec: publish_interaction.
from reflexio import ReflexioClient, InteractionData, UserActionType

client = ReflexioClient()

client.publish_interaction(
    user_id="user_123",
    interactions=[
        InteractionData(
            role="User",
            content="I'm a backend software engineer and I travel for work most weeks. Can you recommend a laptop under $1,500?",
            user_action=UserActionType.NONE,
        ),
        InteractionData(
            role="Agent",
            content="Sure — here's a powerful gaming laptop with 32 GB RAM, just under $1,500.",
            user_action=UserActionType.NONE,
            retrieved_learnings=[
                {"kind": "profile", "learning_id": "prof-abc123"},
                {"kind": "user_playbook", "learning_id": "42"},
            ],
        ),
        InteractionData(
            role="User",
            content="That's far too bulky for constant travel — next time skip the gaming laptops and prioritize battery life and weight.",
            user_action=UserActionType.NONE,
        ),
    ],
    source="chat",
    session_id="session_001",
)
curl -X POST "${REFLEXIO_URL:-https://www.reflexio.ai}/api/publish_interaction" \
-H "User-Agent: my-agent-reflexio" \
-H "Authorization: Bearer $REFLEXIO_API_KEY" \
-H "Content-Type: application/json" \
--data @- <<'JSON'
{
"user_id": "user_123",
"interaction_data_list": [
{
"role": "User",
"content": "I'm a backend software engineer and I travel for work most weeks. Can you recommend a laptop under $1,500?",
"user_action": "none"
},
{
"role": "Agent",
"content": "Sure — here's a powerful gaming laptop with 32 GB RAM, just under $1,500.",
"user_action": "none",
"retrieved_learnings": [
{"kind": "profile", "learning_id": "prof-abc123"},
{"kind": "user_playbook", "learning_id": "42"}
]
},
{
"role": "User",
"content": "That's far too bulky for constant travel — next time skip the gaming laptops and prioritize battery life and weight.",
"user_action": "none"
}
],
"source": "chat",
"session_id": "session_001"
}
JSONWhat this interaction teaches Reflexio
- Profile (durable memory): "Backend software engineer who travels for work most weeks."
- User playbook (behavioral steering): "When recommending a laptop for software development, avoid bulky gaming models — prioritize battery life and weight."
4. Trigger Extraction for This Example
Reflexio extracts automatically once a user accumulates a full sliding window of interactions — by default window_size is 10. This quickstart published only a few, so automatic extraction has not fired yet. To see results right away, trigger extraction manually for this demo.
Demo only — don't do this in production
You normally never call these. In production you just keep publishing interactions, and Reflexio extracts on its own once each user reaches the window. The manual triggers below exist only so this short walkthrough produces a profile and a playbook immediately — don't wire them into your publish path.
Detailed API spec: manual_profile_generation, manual_playbook_generation.
from reflexio import ReflexioClient

client = ReflexioClient()

# Force extraction now so this short demo produces results immediately.
client.manual_profile_generation(user_id="user_123")
client.manual_playbook_generation()  # uses the same default agent version as publish

# Extraction runs asynchronously — give it a few seconds before searching.
curl -X POST "${REFLEXIO_URL:-https://www.reflexio.ai}/api/manual_profile_generation" \
-H "User-Agent: my-agent-reflexio" \
-H "Authorization: Bearer $REFLEXIO_API_KEY" \
-H "Content-Type: application/json" \
--data '{"user_id": "user_123"}'
curl -X POST "${REFLEXIO_URL:-https://www.reflexio.ai}/api/manual_playbook_generation" \
-H "User-Agent: my-agent-reflexio" \
-H "Authorization: Bearer $REFLEXIO_API_KEY" \
-H "Content-Type: application/json" \
--data '{}'5. Retrieve Context Before the Next Response
Retrieve both the user's profiles (durable memory) and the playbooks (behavioral steering learned from feedback) before the next response. One unified search returns the profile and playbook you just extracted, alongside any team-wide agent playbooks.
Detailed API spec: search.
from reflexio import ReflexioClient

client = ReflexioClient()
user_id = "user_123"

context = client.search(
    query="laptop preferences and how to advise this user",
    user_id=user_id,
    top_k=5,
    entity_types=["profiles", "user_playbooks", "agent_playbooks"],
)

profile_context = "\n".join(f"- {p.content}" for p in context.profiles)
user_playbook_context = "\n".join(f"- {pb.content}" for pb in context.user_playbooks)
agent_playbook_context = "\n".join(f"- {pb.content}" for pb in context.agent_playbooks)

prompt = f"""Use this Reflexio context when responding.

What we know about this user (profiles):
{profile_context or "- No profiles yet."}

How this user has steered the agent (user playbooks):
{user_playbook_context or "- No playbooks yet."}

Team-wide agent playbooks:
{agent_playbook_context or "- No playbooks yet."}
"""
curl -X POST "${REFLEXIO_URL:-https://www.reflexio.ai}/api/search" \
-H "User-Agent: my-agent-reflexio" \
-H "Authorization: Bearer $REFLEXIO_API_KEY" \
-H "Content-Type: application/json" \
--data @- <<'JSON'
{
"user_id": "user_123",
"query": "laptop preferences and how to advise this user",
"top_k": 5,
"entity_types": [
"profiles",
"user_playbooks",
"agent_playbooks"
]
}
JSON6. Inspect the Loop
Use the portal to confirm data is flowing:
- Interactions shows published conversations and metadata.
- Profiles shows extracted user memory.
- Playbooks shows user playbooks and aggregated agent playbooks.
- Evaluation shows success rates and shadow comparison results.
Next Steps
- Configuration - tune storage, LLM providers, extractors, playbooks, and evaluation
- Local OSS Get Started - run Reflexio locally with the open-source package
- Publishing Interactions - publish text, image, expert, and bulk interactions
- API Reference - method and schema details
- Web Portal - inspect profiles, playbooks, interactions, and evaluations